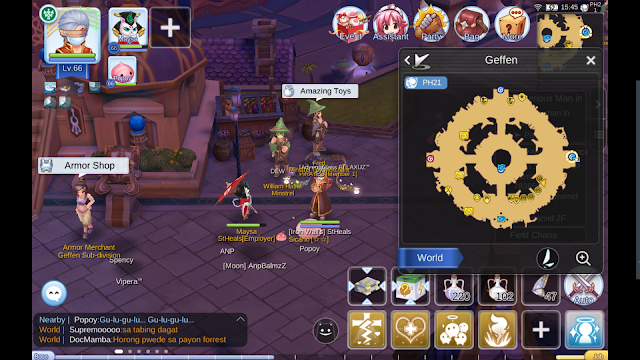
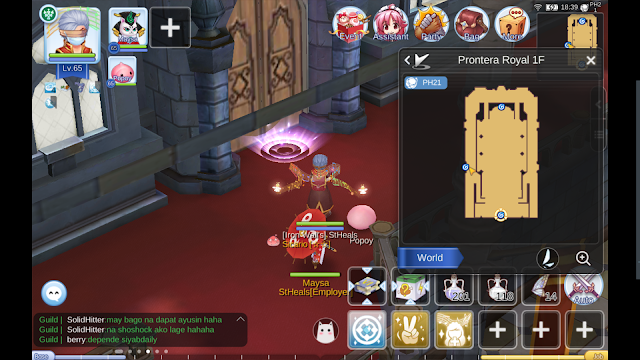
Another use for assistants is their market trend function, allowing players to watch the economy and figure out which items are currently on demand and which ones are losing gains.
Some of the materials that are sold here are Iron, Steel, and Gold Sand; yes, those materials that take forever to farm. I usually buy all available mats from the shop since I have no other use for Eden Coins, aside from Headgear Blueprints from Smile Assistance.
Mathematics: If you can, you can also compare the amount of zeny you're getting for each Eden Coin you're spending and only buy stuff that's cheaper on the Lucky Shop than the Exchange. Something along the lines of: 10 Jellopies is 100z each on the Exchange. So 10 x 100 = 1000z. 1000z divided by the Eden Coin price which is 10 Coins per stack = 1000 / 10 = 100. So if you buy a stack of Jellopies from the Lucky Shop, you'll be spending 100z per Eden Coin.
Cooking "Original Will" items need a high cooking level as well as experience cooking the items themselves. The game tracks each and every food you make and gives you experience for that particular item whenever you successfully create one. It's also a nice way of leveling up your adventure experience as you unlock more recipes.
After daily reset, click a number of times on your pet and/or around it to claim your daily Adventure Meatballs. You can get a total of five stacks of Adventure Meatballs throughout the day if it doesn't already give you all of it after reset. A current glitch/bug in the game does not notify when your pet is ready to give you Adventure Meatballs so it's a matter of clicking on it whenever you can.
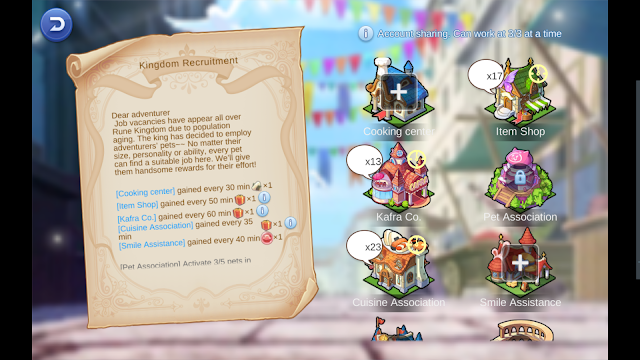
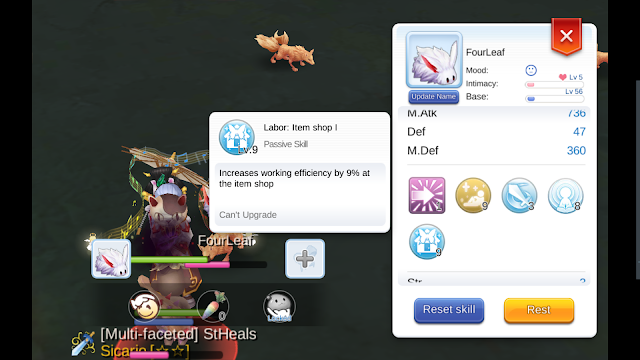
Pet Labor requires the least amount of attention as you only need to check it once (or twice) each day (preferably before accepting Monster Resistance in case you get Base Potions that level you up).
Once unlocked, a shiny new Labor Travelling Machine will appear in your inventory. Using this will open up the Pet Labor window which lists 8 different locations for you to send your pet to:
Now that you've increased your stamina and used the X5 (or X10) mob XP bonus, it's time to grind! Wait... I mean, AFK grind! xD
The only question you need to ask yourself is this: What do you need the most at the moment, farming materials or grinding levels?
It's a tough decision for me but I've recently decided to focus on grinding levels. I then use the loots I gain from the mobs I'm hitting to sell on the "Exchange." Once they sell, I use the zeny to buy the materials I need for my equipment (I wasn't lucky in gacha systems... yet. Hence farming equip mats) (Tip: I farm for zeny now to buy Oridecon or Elunium. Refine > Upgraded Tier). Also, a few of the mats that I need to upgrade/craft my equipment are from mobs that are way below my level, ie Rotten Bandage from Level 38 mobs. (Ragnarok M has a +/- 10 level gap)
It really all depends on you, I guess. All I know is that higher levels equal new content and new content equals new farming materials that are better priced than low-level ones... maybe. (Also farming against people who have multiple emulators and use AOE skills in farming maps are annoying.)
Addendum: Refining, upgrading, enchanting and enhancing equipment is a completely different story.
- Short version: Upgrade your tier 1 equipment to the next tier only when you've refined it to the max level (usually 10).
- Long Version: Based on my understanding, upgrading to the next tier will deduct two points from your refine level, ie. +10 Holy Stick (T1) to +8 Nemesis (T2). Since a Nemesis costs a lot to buy from the auction store - 3M vs a 100k Holy Stick and you usually require a few pieces of the same equipment (at +7 it needed 3 Holy Sticks) for Safe Refines - its cheaper for me to Safe Refine it to +10 now and start from +8 on my Nemesis rather than starting from scratch or a lower level on the next tier. Safe Refines are costly too, since they require a lot more Oridecons/Eluniums than normal refines plus copies of your item but I really do prefer being safe than sorry. xD
Leveling Tip: To maximize Combat Time/Fatigue: I listen to music, use all base and job potions, use fatigue until 420minutes, use up Monster Resistance XP bonus, try to get to 600 minutes if possible and then complete all quests. Quests are completed the very last so we don't waste our precious combat time while at the same time, making sure our XP gauge is at the highest amount available for the next day. If you have the time, you can leave Monster Resistance at the very bottom of your list so that you've fully maximized the amount of XP you can grind. (I do not.)
Farming Tip: Now, there may come a time when you finally decide to farm materials rather than farm the XPs. To do this efficiently, you should try to level up slowly and stay within +/- 10 levels of your target mobs. To level up slowly, you'll want to avoid using Base XP potions and making sure your kill rate is at least 1 mob down per skill use or basically, an efficient use of Combat Time. Aside from not wasting every minute, you'll be up against other players as well who are farming on the same map as you and one-hit kills make sure you get the loots.
Step 6. Do Guild Quests
 |
| An example of mats in exchange for guild contribution points and Gold Medals. *sigh |
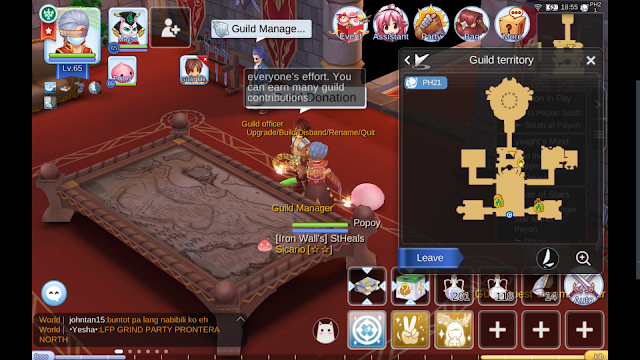
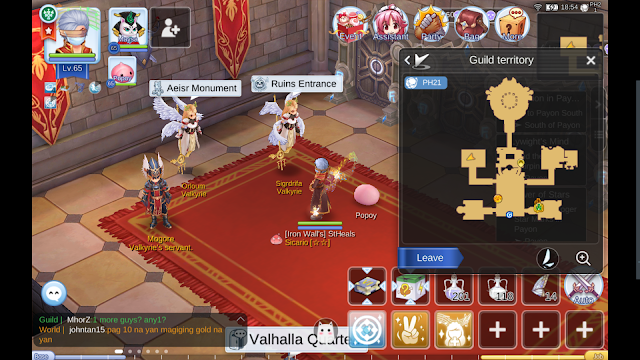
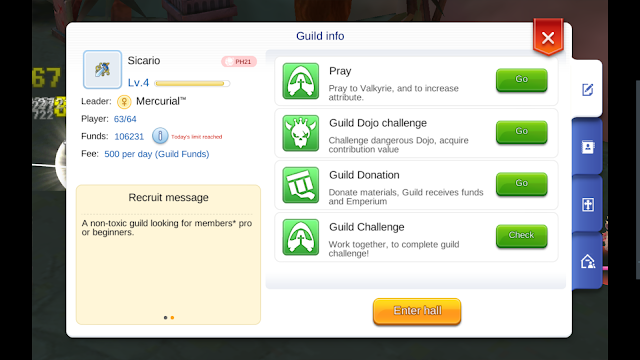
If you haven't already, join a guild as soon as you can as guild content offers stat boosts, MVP and mini-boss encounters, and well, constant friends to party with to do dungeons and rift runs. After joining a guild, 24 hours is required to elapse before you can do the random guild quests littered across the guild hall. These quests give you guild contribution points that are used to unlock stat bonuses from your Aesir Monument (unlocked once you complete the Valhalla quest in your guild hall) and the Valkyrie Altar.
Aesir Monument
 |
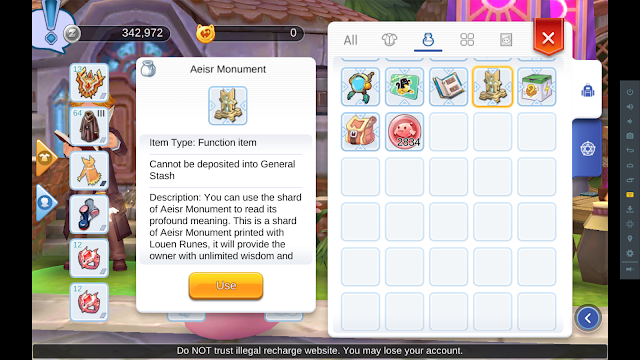
| Aesir Monument in your inventory. |
 |
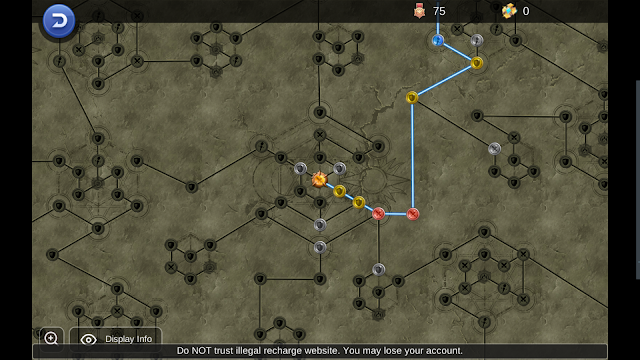
| Grid-like patterns of an Aesir Monument. |
 |
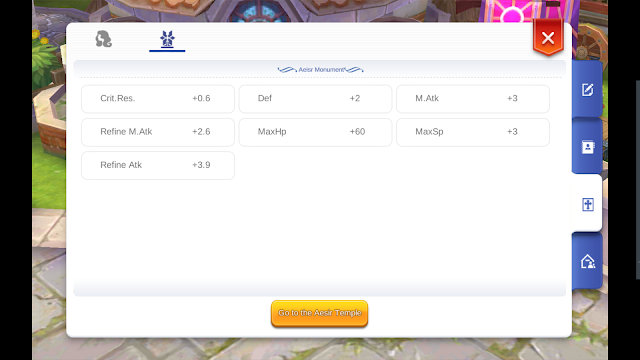
| Aesir Monument tab from guild window shows total amount of stats boosted. |
Aesir Monument (or Runes) is a grid-type sort of upgrade that provides powerful bonuses and other skills not available in your skill tab. Stat runes are unlocked using guild points while the skill runes require Gold Medals alongside your guild points to unlock. At the moment, Gold Medals are reward items from the guild contribution NPC and they do require ultra rare drops that mostly drop from minibosses and MVPs.
You can unlock the Aesir Monument from the Valhalla Ruins NPC located at the mid-left part of your guild hall, exactly in the Valhalla Ruins Room.
Valkyrie Blessing
 |
| Goddess Blessing tab in Guild window listing stats boosted. |
The Valkyrie Altar/Goddess Temple/Guild Blessing is cheaper than the Aesir Monument and uses zeny plus guild points to unlock levels for "Blessings." It does not provide skill upgrades, however. This is where Proof of Faith/Belief Tokens tickets are used whenever the blessing requires 2k+ zeny, ie. a 5k blessing will cost 2 Proofs of Faith and 1k zeny instead.
Guild Dojo
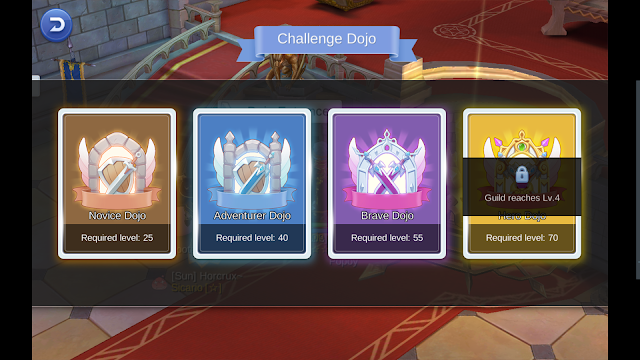
The Guild Dojo, in theory, seems to be a training ground for guild members to test out their combat effectiveness as a party and offers challenges that test out how well individual members work as a team. Also, the Dojo offers rewards for unlocking content the first time. Reruns of previously unlocked Dojo levels garner Guild Contribution Points and proof of friendship points (used for enchanting equipment).
Note: Guild Contribution points and Proofs of Friendship have daily limits.
Valhalla Ruins
 |
| Valhalla Ruins or Guild Dungeons are unlocked once your guild reaches level 2. |
 |
| These contain mobs, mini-bosses and/or MVPs which is pretty useful if you seldom get kills from normal MVP spawn areas. |
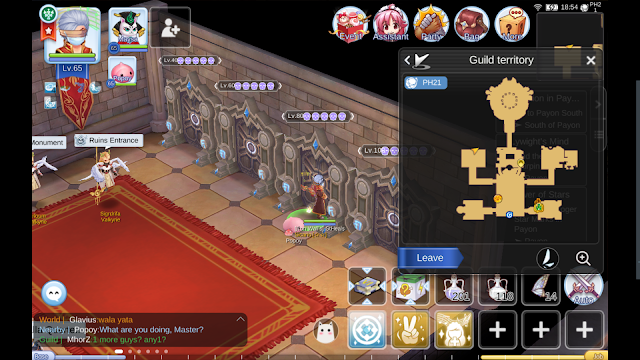
Unlike the Guild Dojo, bosses encountered in the Valhalla Ruins drop loots according to their mob data. Additionally, Valhalla Ruins are level locked (Level 40, 60, 80 and 100) whereas Guild Dojo content is automatically unlocked when the previous stage is completed. However, Guild Dojo tiers (4 Dojo Tiers) are soft-locked, the highest being tier 4 at Level 70.
Update: Finally started on Valhalla Ruins (took me a while since I wanted to be able to support ppl efficiently first before getting in) There are 5 max MVPs for each Valhalla Ruin. This can be checked above the door where mob head icons are replaced with crosses "X" once an MVP has been killed. Valhalla Ruins are reset per week.
Guild Ethics: If an MVP is nearing death, do not kill it until all your party members are present on the map or else they will not get accounted for.
The Ruins require Silver Medals (40 pcs) for each entry and remain open for the whole week. These can be obtained from Guild Quests, Mission Board quests, Rift/Tear runs, Monster Resistance NPC, Training Grounds dailies and the Endless Tower. Of course, you can always spend some real cash if you're short on materials.
Guild Facilities and Guild Challenge
 |
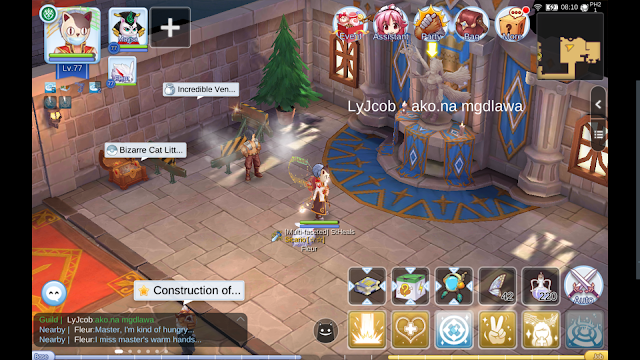
| Location of unlocked Guild Facility hall. |
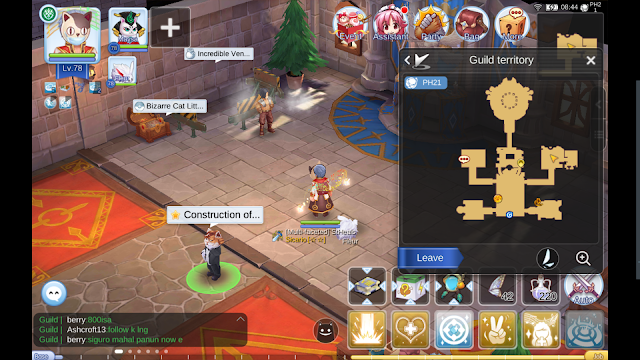
Guild facilities are unlocked as your guild levels up. I think it requires 20 Emperiums to be unlocked by your guild leader. Other than that, I'm not sure about its requirements since I'm not a guild leader. xD Ours appeared at level 3 if that means anything. I think it's just all about mat requirements and people donating Emperiums. If locked, this is the butler NPC located near the music hall. If unlocked, it's a completely new area at 2 o'clock (north-east) of your guild map.
 |
| New Guild Challenge tab when unlocked. |
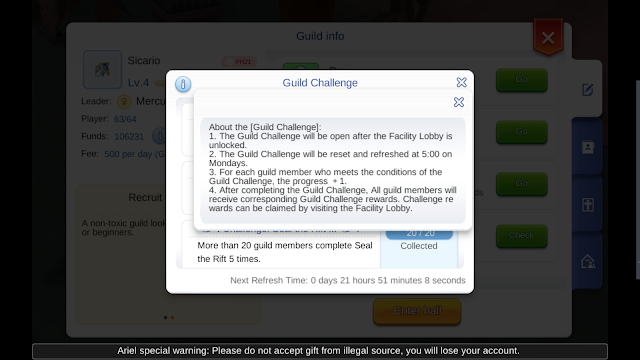
Guild challenges are reset every week and have four tiers for each group of three challenges which are randomly picked, namely: Unity, Endless Tower, Guild Quests, Seal the Rift and Board Quests. The next tier is unlocked as soon as the prior tier is completed. These are easy to accomplish if you do your dailies and your guild members do theirs as well. It's all about partying with people in the guild and completing dailies together. :)
 |
| Sample of Guild Challenges. |
- Unity - This guild challenge only requires guild members to log-in. This is why you'll need a fairly (to very) active guild. I'm assuming that at daily reset, your log-in will count as one log-in which can earn you seven log-ins per week, I think.
- 10 guild members log-in.
- 20 guild members log-in.
- 30 guild members log-in.
- 40 guild members log-in.
- Endless Tower - Requires members to reach level 50 and above of the Endless Tower each.
- More than 8 guild members reach level 50 and above of the Endless Tower.
- More than 15 guild members reach level 50 and above of the Endless Tower.
- More than 20 guild members reach level 50 and above of the Endless Tower.
- More than 30 guild members reach level 50 and above of the Endless Tower.
- Guild Quest - Requires members to complete 5 guild quests each.
- More than 8 guild members complete 5 Guild Quests.
- More than 15 guild members complete 5 Guild Quests.
- More than 20 guild members complete 5 Guild Quests.
- More than 30 guild members complete 5 Guild Quests.
- Seal the Rift - Again, daily resets count: 7 days X 5 Rifts per day = 35 rifts.
- More than 8 guild members complete Seal the Rift quest 5 times each. (Or your daily Rift quest in other words.)
- More than 15 guild members complete Seal the Rift quest 5 times each.
- More than 20 guild members complete Seal the Rift quest 5 times each.
- More than 30 guild members complete Seal the Rift quest 5 times each.
- Board Quests - Daily reset here, again: 7 days X 10 Mission Board quest = 70 counts.
- More than 8 guild members complete 8 board quests each. (Or your daily Mission Board quest in other words.)
- More than 15 guild members complete 8 board quests each.
- More than 20 guild members complete 8 board quests each.
- More than 30 guild members complete 8 board quests each.
 |
| Guild Challenge rules. |
In case you can't read the Guild Challenge rules above:
- As stated, Guild Challenge is unlocked once your guild leader unlocks it for the guild. Contribute to your guild's growth!
- This is a weekly reset quest.
- Every log-in, Rift and Mission Board completion for each guild member counts as one tick for their respective Guild Challenge groups. Again, I'm assuming daily resets count as fresh ticks.
- To receive the rewards, head on over to your guild's facility location and tap on the statue with a yellow arrow above it. Shining Glass Beads seem to be the only reward for Guild challenges and are used in your Bizarre Cat Litter Box facility.
 |
| Tricky to claim though, I opt to click the arrow itself and not the statue. |
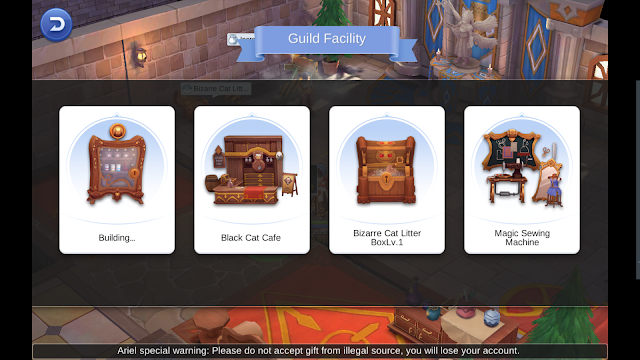
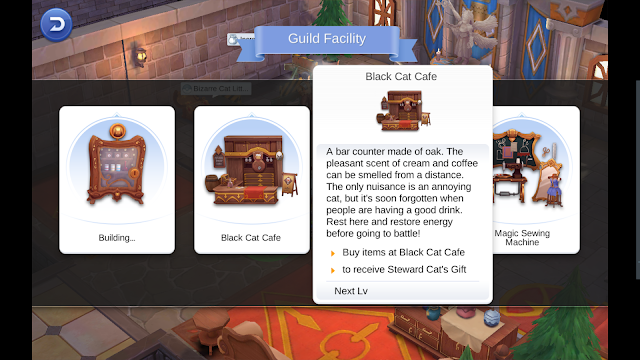
Guild Facilities, on the other hand, are where you buy items that are exclusively bought from each respective facility: Incredible Vending Machine, Black Cat Cafe, Bizarre Cat Litterbox, and Magic Sewing Machine.
 |
| Guild facilities overview. |
- Incredible Vending Machine - Where Mithril and Peak Shards can be bought alongside a few others. Mithril has a weekly limit while Peak Shards have a daily limit.
- Black Cat Cafe - Presumably, this is where you buy PVP and GVG consumables.
- Bizarre Cat Litterbox - This is where you use your Shining Glass Beads from the Guild Challenges to purchase Guild Contribution points, Eden Coins and Zeny.
- Magic Sewing Machine - Where you use Mithril to refine your headwear.
Peak Shards
When you've reached job level 40 on your trans-class character, ie. High Priest, you are now viable for the job breakthrough quest that unlocks job level 70. An in-game mail will be sent to you that directs you to an NPC near the Adventurer HQ portal in Prontera. You will need 30 silver medals to unlock the first 3 levels and succeeding unlocks (in multiples of 3 job levels) will require 9 Peak Shards per unlock for a total of 81 Peak Shards.
Peak Shards are bought from the Incredible Vending Machine and have a daily limit. You should start purchasing these as soon as your guild's Incredible Vending Machine gets unlocked. You use Silver Medals (Level 1), Gold Medals (Level 2) and Nibelungen Shards (Level 3) to purchase Peak Shards.
Note:
- Again, Peak Shards have daily limits.
- You will also be stuck with a dilemma of either doing Valhalla Ruins (which require 40 Silver Medals per door) or purchasing Peak Shards for the week.
- You can only get 100 Silver Medals per week which translates to 5 Peak Shards; 20 Silver Medals each.
- Using Gold Medals is out of the question, at least for me, as these are used for Runes and are ridiculously expensive.
- Nibelungen Shards are farmed from bosses in Valhalla Ruins though the exchange rate of Nibelungen using 40 Silver Medals to unlock each door is not optimal, ie. you won't be able to get the minimum 5 Peak Shards per week using Nibelugan Shards. Of course, you can always weigh your options and calculate.
Step 7. Complete the Training Grounds
 |
| The Training Grounds (TG) are located in Prontera, above the Mission Board Quests. |
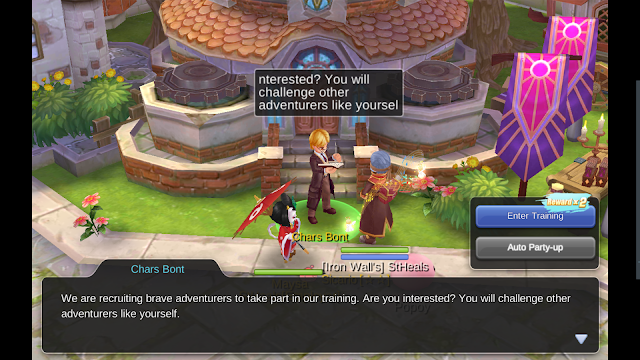
The mobs within scale with the highest member of the party and it is therefore suggested that party members are near each other's level.
Completing the TG requires, at the minimum, a party with a healer and tank to ensure that all five rounds of mobs are completed. The healer will be focusing on keeping up buffs while at the same time, keeping an eye on the tank's HP as well as that of the other members. Tanks should protect their healers, make sure to keep aggro on themselves and keep lures as low as possible.
 |
| Double rewards because of Server Opening Event. |
StHeals Insight: As a priest myself, I prefer Heal over Sanctuary as the latter takes a while to cast over the other. Of course, this means that party members should be careful and avoid getting hit too much or at the same time. I place Heal, Blessing, and Gloria in my auto skills, while Magnificat is rebuffed only after each round as Magni takes too long to cast and has a very long delay. I also semi-auto heal and rely more on manual healing to keep each pt member's hp at 100% as much as possible.
New insight: I now keep Heal, Resurrection, Clearance and Kyrie Eleison in my auto-skills. Heal and Kyrie for auto-targetting and rebuffing cooldowns, Clearance for removing debuffs and auto-Resu since that's faster than manual targetting. I still manual heal when I see a party member lose health as auto-heal waits for a member's health to be equal to or lower than my current heal amount before it activates. Buffs are all manually recasted, can't be lazy anymore. xD
Currently, Spear Knights are the deadliest opponents for me if I end up in a party without a good tank. (Lately been helping guildies accomplish all dailies.) These knights can wipe my party if I'm not paying attention and XP loss is a big no-no. You've been warned.
A good party would probably be composed of a healing and buff priest, a good tank/kiter, dmg dealers and stun or disabling classes to minimize the damage from mobs.
A good trick is to hug either the left or right walls of the map and work from one direction to the other before the start of each round so that mobs on the other side of the map do not get lured and thus, keep the current aggro to about 1-3 mobs.
Notes:
- Be wary of rounds where spear knights and AOE wizards appear as these mobs deal the most damage to a party and may cause a party wipe.
- Auto attacks and auto-targeting within the TG are not recommended as mob targetting is randomized and may lead to all mobs getting lured at once. Party members should focus on one mob and work their way towards the other side of the area.
Step 8. Complete Rifts
Night of Destruction
When you reach Base level 80, the Night of Destruction (NoD) instance in Glast Heim will open up for you. This is an alternative to the Rift Quests, ie. completing Night of Destruction will count as Rift Quests. This instance, however, might be hard for some and requires very good party coordination as well as players that understand the mechanics of each level (compared to sealing five rifts in Fix the Time Rift quests, Night of Destruction has five levels for your party to complete).
- NoD is easier to do with a priest and not only because you need support but because Aspersio (holy property buff) shines in this instance as most mobs are either Undead or Demon.
- TU works on some of the mobs though I would advise the Priest to focus on supporting and keeping the party alive.
- Pay attention to the ground during boss encounters as Meteor Storm hurts like hell.
- On Level 5, avoid killing the Abysmal Knights and solely focus on the boss by luring him away. Killing an AK makes the boss a bit too overpowered for a certain amount of time and might wipe your party.
Spacetime
Reaching level 90 unlocks the Spacetime Instance in Aldebaran. Like NoD, this requires a good party composition and an understanding of the mechanics for each level (max of five).
- Clock has reflect damage and seems to be the hardest stage (for me) as this is the level when most of my party members keep fainting.
Horror City
Reaching level 95 unlocks the Horror City Instance in Gingerbread City.
General Tip for all Instances: You can, however, opt to just do the first level of these instances by completing the first level, leaving the map and then re-entering again to refresh the level count. Just a bit of warning, loot rate might be/might not be affected if you only choose to complete the first level each time. Nothing beats seeing the rewards pop up on your screen after completing all levels successfully since you know you did all that you could for the loots but like I said, these special instances need some strategy unless of course your toons are overpowered/OP.
Fix the Time Rift
 |
| Fix the Rift daily quests can be done 5X per day. |
Tears are special areas on the map which are activated through the Rift NPC located in Prontera; beside the Mission Board and Monster Messenger.
You unlock rifts by completing them solo during the first time after which rift locations will unlock in the Rift NPCs rift map.
There's one in the West Gate, Underwater Ruins, Mt. Mjolnir, Sorgrat/Morroc, Payon Forest, Orc Village, and Glast Heim Outskirts.
When you are partied up and ready to complete rifts, visit the Rift NPC and choose a map for your party to complete five rifts. You could choose 5 different locations but that would mean teleporting back and forth from the Rift NPC.
Once activated, head on over to the map you chose and check your minimap for the location of the rift tear.
 |
| Rifts are randomly generated on the map, one at a time. |
 |
| Two options to fix rift, auto (Instant) and manual (Open Rift). |
You can choose to auto-complete the rift using Holy Grails that are dependant on the map you chose, ie. Payon for Payon Forest, or take the challenge and complete rifts through battle. Be warned though that completing rifts manually need a good party as mobs tend to hit-lock if too many are summoned/alive at once; minibosses are summoned too.
Holy Grails are purchased using Adventure Meatballs. Ecclesias can be used too though these are harder to come by.
Tip: Sograt Rift drops are currently the only ones that are above 100k on the Exchange for each item.
Step 9. Complete the Mission Board Quests
 |
| Location of Mission Board Quests. |
These are 10 random quests of hunting, collecting or escorting missions that reward you with base XPs, job XPs, zenies and random loot like Butterfly Wings, Leaf of Yggdrasils, Zeny bags (2k per bag), Belief Tokens, Lightning Chains, and Food Packs. (And since the Server Launch event is still ongoing, you get X2 the rewards!)
 |
| Mission Board Window. |
As you complete each mission, the rewards indicator at the bottom of the Mission Board window increases from 100% to a maximum of 200%. Meaning, the XP rewards multiply as you go through the 10 missions listed on the board. (That's an X4 bonus if you include the Server Launch event :D )
I usually spend my Adventure Meatballs for the Mission Boards because who has the time. (lol) If you do, then, by all means, go for it and complete them manually. :)
Step 10. Get Monster Resistance Quest from the Messenger
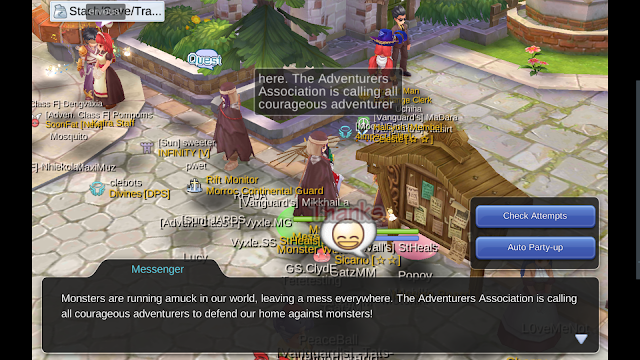
The Monster Watcher Messenger NPC is available in all towns and can usually be found near the Mission Board.
 |
| Location of Monster Messenger in Prontera, near Mission Board. |
He offers an X5 mob exp (X10 at the moment because of the Server Grand Opening Event) two times per day and can stack for a maximum of 6 times when you miss doing his quest. There's a limit too to the amount of bonus mob XP you'll be getting depending on your level. At Level 65, he offers a max of ~700k bonus mob XP.
I usually get his quests before I grind to up the XP I'm getting while at the same time, to make sure I don't miss his quest. It does take a while to complete the bonus XP amount when it reaches 500k+.
Update: I don't get him until I'm sure I've done all XP giving quests and dailies that I can do. Then and only then do I activate Monster Resistance. Any bonus to XP at level 70+ is uber useful as the grind at this stage of the game is real. Getting him after doing all others first makes sure that I either level up first and increase his XP limit or get close to leveling up that my second MR (Monster Resistance) gets an increased XP limit.
Tip: If you're just about to level up, skip him until you hit the next level just so the max bonus he gives you is higher.
Added Tip: If you can resist leveling up ASAP, get Monster Resistance after you've completed your other dailies just in case you level up during the process. Leveling up prior Monster Resistance means a higher XP limit.
Final Tip: It bears repeating, get him only if you've accomplished as much of the XP giving quests for the day as you can.
Uber Final Tip: Stack Monster Resistance to the max six and then use only two Monster Resistance daily once you hit max. This will give you a reserve of four Monster Resistance XP bonuses which you can use during instances when you need XP. You should, however, use all Monster Resistance bonuses before the X10 event ends since it will return to its normal X5 bonus after the event.
Warning: I've come to realize that using up MR bonus EXP when your stamina is in the red takes quite a while (like alot). If you do not have the time like me, when you've accumulated 6 MR bonuses, use up two MR boosts when your stm is yellow (or green). Keep in mind that MR bonuses do not count until they've been used up and handed in, ie. you've only used one up and handed it in then took your second MR. If you check your attempts at the MR NPC, you'll notice that he will still have five counts of MR bonuses at bay. You need to use up two MR bonuses or else waste one MR boost if you just use up one and reserve the other, thinking that you'll get two new MR boost come reset time.
As a Level 90+ Overall Tip: The use of Monster Resistance bonus is entirely up to you on whether or not you want to level up fast. In my case, I needed to level up my toon as quickly as possible to unlock levels for better stats and job levels for more skill points to unlock buffs.
The downside was I could not grind lower level mobs efficiently, I was skating by them. If you're grinding for loots, you can skip MR all together but be warned that completing MR quests give you 1 Silver Medal (and Silver Medals are needed in the higher levels).
It also doesn't matter if you're on green, yellow or red stamina. You'll level up one way or another and for me, I need the Silver Medal reward now more than the XP. I prefer green stamina now too as it quickly finishes the 2X MR quest and gives me time to do other things in the game. I still stack them though, because you never know when a boost in XP is needed.
Overall, get MR quests when you're in the green but if you need to level up quickly, apply the rules of completing all XP quests and leveling up first (if you're just about to) before getting MR bonuses for the increased limit.
Step 10. Free Time to Do All Other Quests
If you've completed the steps outlined above, congrats! You've finished your dailies successfully and may now proceed to try out and continue on to the other features available in the Ragnarok M: Eternal Love:
- Adventure Meatballs - Aside from auto completing Training Grounds and Mission Boards, you can also use Endless Tower Ejectors and purchase a few key ingredients used in high-tier recipes like Devil Wing (450 pcs. Black Wing). These have daily limits!
- Zodiac Quest - Buy your Hand in Hand skill from the Adventurer Skill NPC and hold hands with anyone to complete this daily. Visit the Zodiac NPC, near the cat mercenaries in Prontera, and answer a few questions to earn your zodiac rewards for the day.
- Endless Tower - Challenge the
100 90 floors of the Endless Tower and get amazing loots. (Floors 91+ not yet implemented) This instance resets weekly on Monday, 6AM GMT+8. Soft-lock levels are located on each 10th multiple floors, ie. Levels 10, 20, 30, 40, 50, etc. At Level 50, two MVPs are spawned. At Level 80, both MVPs will attack if any of them gets aggro'd.
- Questing and Missions - Main Quests or Reds (or Purple at Level 60+), Daily Blue Quests, and One-Time Greens or Sub-quests (Exclamation points "!" on your map) reward you with experience and mostly guide you through the world of Ragnarok M: Eternal Love. There's also Shiny/Star Quests, Castle Quests, Collection Quests, Hidden Quests and various other pop-ups on your minimap. Or in other words, there are a lot of quests once you've reached level 80+.
- Pet Adventure - I would advise doing Pet Adventures when you get to max level as these require 60 minutes of combat time. Loot from Pet Adventure is great though, if you're lucky. Or you can use your alt characters on the same account so you can get started on Pet Adventure.
- Adventure Questing - Adventure Skill Points unlock various useful and sometimes cosmetic updates for your character. Getting these skill points and unlocking levels require players to explore the world of Rune Midgard (ie. Ragnarok M: Eternal Love) to increase their Adventure experience. You can track any and most information about Ragna using your Adventure Handbook (located in the "More" button on the upper right of your screen). Skills include unlocking more skills and auto-skill slots, MVP and miniboss counters on the map, Stay Alert, two cats, Ymir's Notebook, and camera upgrades, among others.
- Arena/PVP - There's a daily limit of 300 fighter coins per day and 1000 fighter coins per week. Use these coins in the Arena NPC shop.
- Food Shop - In case you miss it, the food shop offers a free Warm Meal (120k HP and 8k SP) daily which activates whenever your HP is below 70% or SP is below 40%. A definite need for those early days of leveling. If you have Premium status, the NPC also offers B Grade Meals or a Hot Dish and then offers a 50% discount on said food items if you make a purchase right after.
- Gingerbread City Dailies. There are 3 NPCs near the mid-top area that each require 3 daily quests completed in Gingerbread City, Toy Factory 1F and Toy Factory 2F. Once completed, you'll be rewarded with a 3 Boxex (1 from each NPC) that contains various items.
- Mentor Dailies (Base Level 85). Use Mentor Medal to buy 5 Mora Coins each day. Mora Coins are needed for Enchanting equipment and getting that elusive Fourth Enchant. You should also use "Adventure Guide" on your students for one of the daily student quest.
- Greedy Shop. The Greedy Shop can be found randomly in Toy Factory 1 once 10 small Myst Cases are killed and will last for 2 hours. Three items are sold here which are, surprise, random too. You will need a couple of zenies and Edelweiss to purchase items (Edelweiss can be farmed from the mobs in this area). There is a daily limit for purchases and will refresh come reset time.
- Poring Battle (Weekly, Wednesdays @ 8PM +7 GMT SEA). Get your Guardian Medals for Lemegeton Fur, Lemegaton Tear, and Cat Grass!
- Oracle Dungeon. Three difficulties, rewards include Dust of Oracle, Quartz of Oracle and Fong's Salt.
12. Use Your Alternate Characters on the Same Account
 |
| Handling 3 characters. uwu |
Ragnarok M: Eternal Love wants you to keep playing the game for as long and as frequent as possible hence why they give us 2 extra character slots (3rd character slot unlocked when one character reaches trans job, or job after 2nd job, ~80 base level).
I am adding this in the dailies list because alternates (alts) are very useful once you unlock the Shared Stash feature (Level 40) for each of them. This gives you an extra 600 minutes (or if you're hardcore: 600 + 120 (2x Music) + 240 (2x Mentor) = 960 minutes) more of farming time daily. That's 16 hours of game time! =)) Chains, of course, cut this down in half (8 hrs.) but still, this might lead to burnout.
You've been warned.
For casual players, if you have the extra time, battery and patience, ie. during sleep, you can AFK farm (read: not grind, you want to keep leveling as low as possible to keep level gap within levels of low-level mobs that are easy to kill) your alt characters at a spot where loots are profitable or sell fast on the Exchange. It's advisable too that you pick spots where you one hit mobs (at a maximum of two hits) to increase the zeny and loots gained per fatigue. (At level 50, I still use my alts to farm Lvl20+ Skeletons in the Ghost Ship, definitely level gap (+/- 10 of mob level), but I still get drops. Probably lower rate though, but kill times are fast at 1-2 hits. Also zeny (52-ish zeny) is constant-ish.)
It is also advised to pick character jobs that have AOE skills (Blacksmith's Hammerfall, Wiz's Heaven's Drive or Archer's Arrow Storm) to increase mob kills per skill. Ofc, this is a matter of whether your SP can keep up. I say go with any job you want, this is just a guide based on max efficiencies stated by other players. What you want to be is up to you. ;)
Tip: To be organized, use your main character to grind, use one alt character solely for Pet Adventure and then use the last alt for farming. Send all of your farmer's Adventure Meatballs to your Pet Adventure alt.
13. Conclusion
This Daily Quest guide serves more as a general overview of what you can do each day when you've done most of /what you think/ you can do each day and wonder what to do next. I know it's all a bit overwhelming if you're just starting out (I know I would've been overwhelmed) but this is just a guide and not some rulebook you /must/ follow.
You're definitely not required to do everything, you can even just explore the world and take selfies and no one will judge you, certainly no judgments from me. What matters most is that you play the game because you enjoy it and you like doing it. Look at me, aside from playing the game, I enjoy answering questions (that I know the answer to) and making guides that help other players (myself included). ;)
Explore Rune Midgard. Read the NPC dialogues. Discourse with friends. Take your time. Ragnarok M: Eternal Love is a gaming platform that allows all kinds of interactions. Do what you most enjoy and the rest will follow. :)
Play Ragnarok Mobile in a way that would benefit you and your happiness. If we take out the fun in gaming, why play right?
 |
| Remember to have fun! <3 |
If I missed or there are any errors in this guide, feel free to comment them below or send us a message via our "Contact Us" page. Thank you~!
Update Mar 04, 2019
- Removed Tokyo-3.
- Added Oracle Dungeon weekly.
Update Feb 02, 2019
Update Feb 01, 2019
- Late to the party but Poring Battle Event added. =))
- Formatting.
- Added Event-related dailies.
Update Jan 16, 2019
- New year, new updates.
- Scattered a few tips here and there.
- Updated Pet Labor rewards.
- Updated NoD and added Spacetime section.
- Reorganized updates section and placed current updates at the top of the list.
Update Dec 27, 2018
- Gingerbread City Dailies.
- Mentor Medals and Mora Coins.
- Greedy Shop.
Update Dec 26. 2018
- Added Peak Shards and additional Adventure Meatball stuff.
- Various tweaks again as a level 90+ toon and learning a bit more.
Update Nov 23, 2018:
- Tweaked Culinary Association Section.
- Various fixes to typos because human.
- Scattered tips (all throughout and don't remember where because human) because I learn new stuff every day.
- Added a bit of Night of Destruction.
Update Nov 20, 2018:
- Added Alternate Characters.
- Added Conclusion :)
- Added Guild Quest and Endless Tower to Guild Challenges.
Update Nov 19, 2018:
- Added the one thing that you should definitely do daily: Mission Board quests. =)) Was using meatballs for this so I ended up forgetting about it.
- Moved Monster Resistance to the bottom because maximizing XP.
- Added tip for the Lucky Shop.
Update Nov. 18, 2018:
- New insight for grinding/farming, Monster Resistance (again), Rifts, and Valhalla Ruins. Added Guild Facility and Guild Challenge and Arena/PVP-ish.
- Pet Labor moved to dailies. Lucky Shop changed from "Buy everything" to "Check it for rare loots."
Update Nov. 12, 2018:
- Added tip for Monster Resistance.
